
7 G+1 Villa Construction Stages in Dubai
A G+1 villa is a villa with a ground floor and one floor above it. G+1 villa construction stages are the ordered steps that take that villa from an empty plot to a finished home that is ready for inspection, connection and handover. That order matters. Each stage creates the base for the next stage.…
MBRHE Approved Contractor, Housing File No. 1076949. Approved company with Emirates Islamic Bank. 200+ completed projects. Office in Al Garhoud, Dubai.
A G+1 villa is a villa with a ground floor and one floor above it. G+1 villa construction stages are the ordered steps that take that villa from an empty plot to a finished home that is ready for inspection, connection and handover.
That order matters. Each stage creates the base for the next stage. A foundation that is not checked cannot carry a structure with confidence. A structure that is not closed cannot protect MEP work. MEP work that is not fixed before walls close cannot be reached without breaking finished work.
This guide follows the seven stages in order. It also shows what to check at each stage, what documents to ask for, and where owners most often lose time. It is written for a villa owner first, and the Bridge section shows how the same sequence applies to an office project.
Handy Care building contractor in Dubai works from Al Garhoud, Dubai. Handy Care is an MBRHE Approved Contractor, Housing File No. 1076949. That number is a housing file number, not a trade licence number. Handy Care is also an approved company with Emirates Islamic Bank, and reports 200+ completed projects in total. Use that as background only. Judge any build by its drawings, its approvals, its inspections and its finished work, not by a headline count.
The short answer
What are the 7 G+1 villa construction stages in Dubai? They are plot and approvals, foundation, structure, block and masonry, MEP first fix, finishing, and handover.
Start with plot and approvals. Then build the foundation, the concrete frame, and the walls. Then fix the services while the building is still open. Then finish the inside, test everything, and hand over only after inspection and snagging.
If you remember one rule, remember this. Never start a later stage to make up for a missing check in an earlier stage. A missing approval, a missing inspection, or a missing drawing will return later, and it will cost more to fix then than it costs to settle now.
Table 1. The 7 stages at a glance, and what the owner checks at each stage
Stage | What happens | What the owner checks |
|---|---|---|
| Plot checks, design, drawings, NOCs and building permit | Approved drawings, permit, and approval list in writing |
2. Foundation | Excavation, foundation works, waterproofing, and foundation inspections | Foundation inspection record and setting out against the approved drawings |
3. Structure | Columns, slabs, beams, stairs, and roof slab for ground floor and first floor | Floor by floor inspection records and concrete quality checks |
4. Block and masonry | Block walls, plaster, and preparation for services and finishes | Wall lines, openings, levels, and plaster readiness |
5. MEP first fix | Electrical, plumbing, drainage, HVAC ducts, and cabling while walls are open | First fix routes, points, and test records before walls close |
6. Finishing | Flooring, ceilings, joinery, kitchens, bathrooms, painting, and MEP second fix | Samples, mock ups, finish quality, and second fix testing |
7. Handover | Final inspections, snagging, completion certificate, connections, and keys | Snag list cleared in writing, completion documents, and as-built records |
Stage 1. Plot and approvals
Plot and approvals in G+1 villa construction stages are the checks, drawings and permissions that must be settled before excavation starts. This stage protects everything that follows, because it fixes what can be built, where it can sit on the plot, and under which permit it will be inspected.
Start with the plot itself. The affection plan shows the plot boundaries, the permitted use, the height limit, and the setbacks. In a master community, the developer rules add a second layer. They can cover the villa footprint, the boundary wall, the facade, the roof form, and the working hours for the site. Read both layers together. A design that fits one layer and breaks the other will stall at approval.
Next comes design and engineering. Architecture fixes the room layout, the stairs, the openings, and the facade. Structure fixes the frame, the loads, and the foundation type. MEP design fixes the electrical loads, the plumbing routes, the drainage routes, and the cooling plan. These three designs must agree. A room that moves after structure is drawn, a duct that has no ceiling space, or a stair that does not fit the slab opening are all design clashes, and they are cheapest to fix on paper.
Soil investigation and survey work belong in this stage too. A topographic survey fixes levels and boundaries on the ground. A soil investigation gives the foundation design its ground facts. Without those facts, a foundation type is a guess, and a guess under a G+1 villa is a risk no owner should accept.
Approvals then follow in order. In a master community, the developer NOC usually comes first. The building permit application follows, with drawings and documents submitted through the Dubai Municipality building permit system. Other authorities add their NOCs inside the same application where their input is needed, and those can include DEWA for electricity and water, and Civil Defence where fire and life safety work is in scope. The permit and the stamped drawings are the authority to start. Verbal approval is not a permit. A developer NOC alone is not a building permit. Wait for both where both are required.
Three checks that belong in G+1 villa construction stages at this stage are a plot and setback check against the affection plan, a design clash check across architecture, structure and MEP, and an approval list check that names the developer NOC, the building permit, and every other NOC that applies to the plot.
Three documents to ask for in G+1 villa construction stages at this stage are the affection plan, the approved drawings set, and the building permit with the stamped drawings.
Three mistakes to avoid in G+1 villa construction stages at this stage are starting excavation on a verbal approval, approving a design before MEP routes are checked, and accepting a drawing set where architecture, structure and MEP do not agree.
Table 2. Approvals and documents to settle in Stage 1, before work starts
Approval or document | What it covers in general | Owner check |
|---|---|---|
Affection plan | Plot boundaries, permitted use, height, and setbacks | Plot limits match the design footprint |
Developer NOC, in a master community | Community rules and community approval for the proposed work | NOC names the scope that will actually be built |
Building permit and stamped drawings | Legal authority to build to the approved design | Permit and stamped drawings are in hand before excavation |
Structural drawings | Frame, foundation, slabs, columns, beams, and stairs | Structural drawings match the architectural layout |
MEP drawings | Electrical, plumbing, drainage, HVAC, and cabling routes | MEP routes have space in ceilings, walls, and shafts |
Inspection plan | Inspections at foundation, structure, and completion stages | Inspection points are named before work starts |
Itemised quote and BOQ | Scope, materials, quantities, and specifications in writing | Quote can be compared item by item, not as a lump sum only |
This table is general guidance, not legal advice. The exact approvals for a plot depend on the community, the authority area, and the scope. Confirm them in writing, with a named owner for each approval, before work starts.
A written contract and an itemised BOQ also belong in this stage. The BOQ breaks the work into materials, labour, specifications and quantities. It should state what is included and what is excluded just as clearly. A lump sum alone cannot be compared, questioned, or held to account. Ask what the contract covers for scope, materials, finishes, timeline, payment milestones, variations, delay terms, dispute terms, termination terms, and defects terms. Ask how variations are priced and approved before variation work starts. Ask how defects are reported and cleared after handover. Do not assume a warranty exists because a brochure mentions quality. Read what is actually written.
Stage 2. Foundation
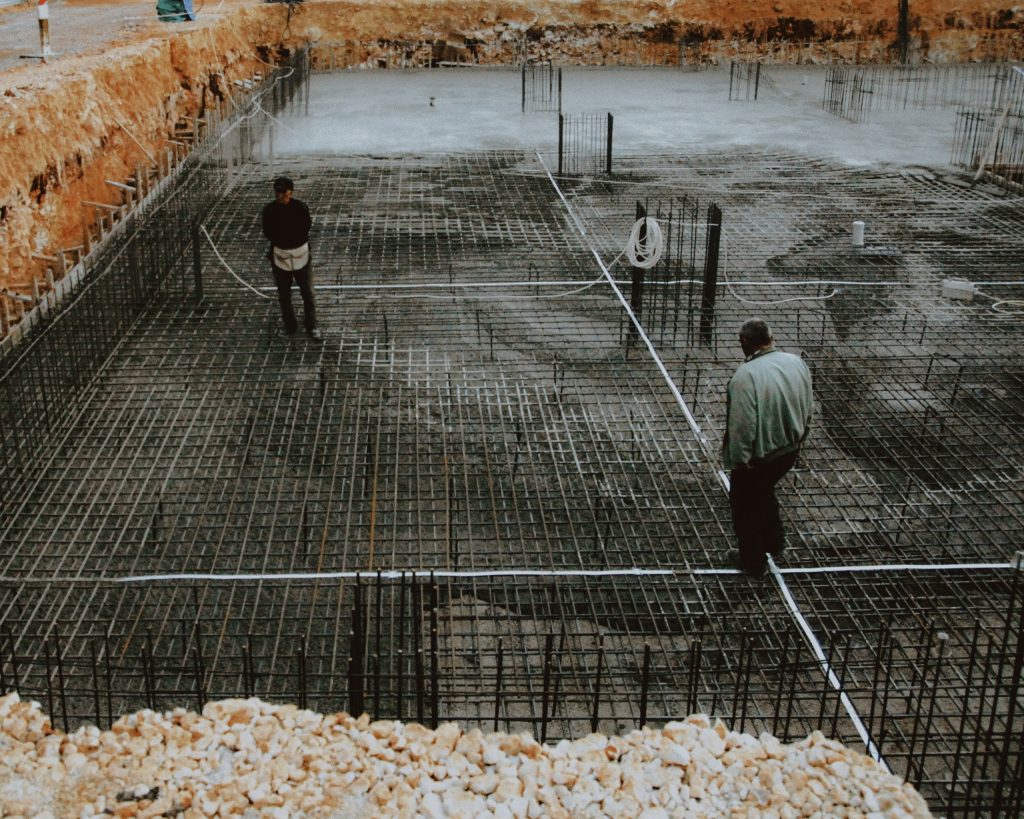
Foundation in G+1 villa construction stages is the excavation, foundation works, waterproofing, and inspection work that transfers the weight of the ground floor and the first floor safely into the ground. This stage is hidden once it is covered, and that is exactly why it must be checked while it is open.
Site mobilisation comes first. Hoarding, a site office, temporary utilities, and access routes are set up. The villa is then set out on the plot against the approved drawings. Setting out is not a formality. A villa set out in the wrong place, at the wrong level, or with the wrong orientation will carry that error through every later stage.
Excavation follows the foundation design. Where the ground needs it, shoring and dewatering are used to keep the excavation safe and dry. The foundation itself is then formed, reinforced, and cast. Waterproofing is applied where the design requires it, and it must be protected before backfill, because a waterproofing layer damaged during backfill is a leak waiting for the first heavy rain or the first plumbing fault.
Inspections belong at this stage, not after it. Foundation and shoring inspections are requested at the key points named in the inspection plan. A foundation inspection checks setting out, reinforcement, levels, and readiness to cast. It is the last easy moment to correct a foundation error. After concrete is cast and covered, correction becomes demolition and rebuild.
Three checks that belong in G+1 villa construction stages at this stage are a setting out check against the approved drawings, a reinforcement and level check before casting, and a waterproofing protection check before backfill.
Three items to record in G+1 villa construction stages at this stage are the foundation inspection record, the waterproofing product and coverage notes, and the as-built levels for the foundation.
Three mistakes to avoid in G+1 villa construction stages at this stage are backfilling before waterproofing is protected, casting without an inspection record, and accepting a foundation level that does not match the approved drawings.
For a G+1 villa, the foundation must be read as a two floor foundation, not a single floor foundation. The ground floor slab, the columns, and the first floor slab all load the same foundation system. That is why the structural design, the soil facts, and the inspection record must agree before the frame starts.
Stage 3. Structure
Structure in G+1 villa construction stages is the reinforced concrete frame that carries the ground floor, the first floor, and the roof. Columns, beams, slabs, stairs, and the roof slab are built floor by floor, and each floor is checked before the next floor starts.
The ground floor frame comes first. Columns rise from the foundation, beams span between them, and the first floor slab is cast on top. That slab is both a floor and a working platform. It must be checked for levels, openings, and stair positions before the first floor frame starts. A stair opening in the wrong place, a slab edge out of line, or a service opening missed at this point will force cutting, patching, or redesign later.
The first floor frame follows the same sequence. Columns rise from the first floor slab, beams span, and the roof slab closes the frame. The roof slab needs the same care as any floor slab, plus roof drainage falls, waterproofing preparation, and roof access where the design provides it. A roof that ponds water will stain ceilings, damage finishes, and shorten the life of the roof system.
Every concrete pour needs a check chain. Reinforcement is checked before casting. Formwork is checked for lines and levels. Concrete quality is checked as the design requires. Inspectors sign off at the stages named in the inspection plan. That chain is not paperwork for its own sake. It is the only record that proves the hidden frame matches the approved design.
Three checks that belong in G+1 villa construction stages at this stage are a reinforcement check before each pour, a level and opening check after each slab, and a stair position check before the next floor starts.
Three items to record in G+1 villa construction stages at this stage are the inspection record for each floor, the concrete check records for each pour, and the as-built slab levels and opening positions.
Three mistakes to avoid in G+1 villa construction stages at this stage are casting a slab with an unchecked stair opening, starting the next floor before the lower floor inspection is recorded, and covering a frame defect with blockwork instead of correcting it.
Table 3. Structure sequence in G+1 villa construction stages, ground floor to roof
Part of the frame | What happens | Owner check |
|---|---|---|
Ground floor columns and beams | Frame rises from the foundations to first floor slab level | Column lines and beam levels match the drawings |
First floor slab | Slab cast, with stair and service openings formed | Slab levels, stair opening, and service openings checked |
First floor columns and beams | Frame rises from the first floor slab to roof slab level | Column lines and beam levels match the drawings |
Roof slab | Roof frame closed, with drainage falls and roof access where designed | Roof levels, drainage falls, and access position checked |
Stairs | Stair flights and landings built as part of the frame sequence | Stair width, headroom, and landing positions checked |
Parapet and roof edge works | Roof edge and parapet formed as part of the roof works | Parapet lines and roof edge details match the drawings |
A G+1 villa is a two floor load path. Every column, beam, and slab in that path must be read together. A single floor check, without the floor above and the foundation below, does not prove the frame.
Planning a project in Dubai? Talk to Handy Care before you sign.
Stage 4. Block and masonry
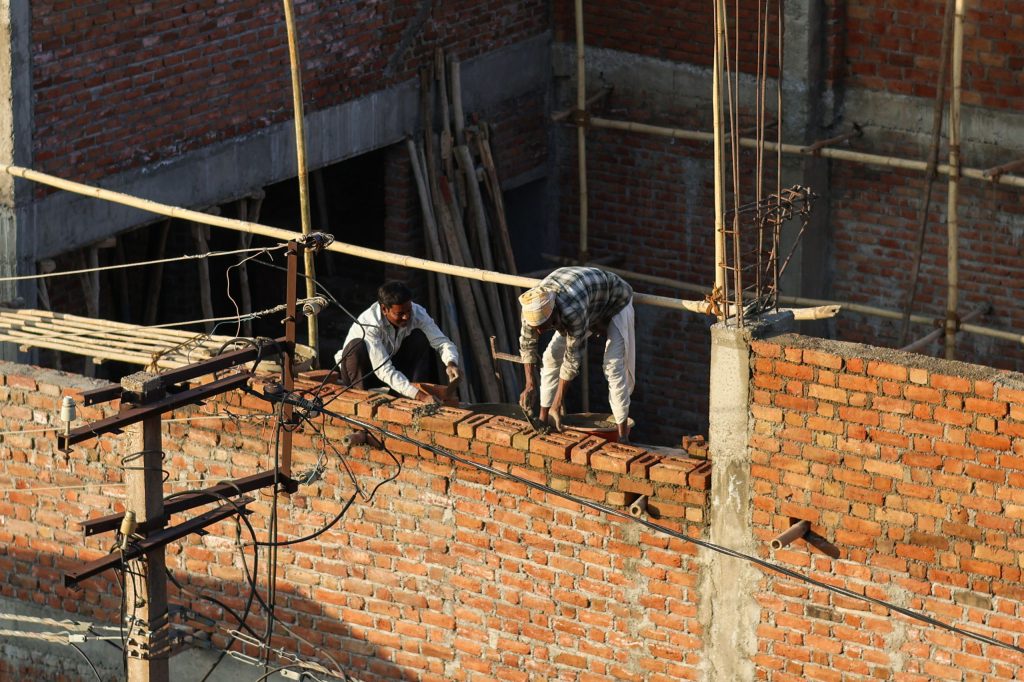
Block and masonry in G+1 villa construction stages are the block walls, openings, and plaster preparation that turn an open concrete frame into rooms, corridors, and a weather tight envelope. This stage fixes room sizes, door positions, window positions, and wall lines, and it prepares every surface for services and finishes.
Blockwork starts after the frame for that floor is ready. Walls are built to the approved lines, with openings left for doors, windows, and service routes. Lintels carry the blockwork above openings. Wall ties, movement joints, and blockwork quality checks belong here, not after plaster hides them. A wall built out of line will show in every later finish, from tiling to joinery to door fitting.
Plaster follows blockwork, once the walls are checked and the first service routes are planned. Plaster gives the wall its flat, true surface. It also protects blockwork and prepares it for paint, tiling, and joinery. Plaster that is applied over a damp, dusty, or unchecked wall will crack, bubble, or peel, and the finish applied on top of it will fail with it.
The envelope closes during this stage too. External blockwork, insulation where designed, waterproofing at wet and exposed areas, windows, and facade works turn the frame into a building that keeps water and heat out. A villa is not weather tight because the roof is on. It is weather tight when walls, windows, facade, and roof details work together, with no gap left for water to enter.
Three checks that belong in G+1 villa construction stages at this stage are a wall line and opening check before plaster, a plaster surface check for flatness and cracking, and an envelope check for windows, facade, and waterproofing details.
Three items to record in G+1 villa construction stages at this stage are the wall and opening check notes, the plaster readiness notes, and the window and facade installation notes.
Three mistakes to avoid in G+1 villa construction stages at this stage are plastering over unchecked blockwork, closing a service route before MEP first fix is planned, and accepting a window or facade gap as a finishing problem to fix later.
Block and masonry also set the limits for MEP first fix. Electrical points, plumbing routes, drainage routes, and duct routes must have space in walls, shafts, and ceilings. If a wall is built without a planned route, the route will be cut later, and cutting weakens the wall and breaks the plaster. That is why blockwork, structure, and MEP drawings must be read together before the first block is laid.
Stage 5. MEP first fix
MEP first fix in G+1 villa construction stages is the installation of electrical, plumbing, drainage, HVAC, and cabling routes while walls, ceilings, and floors are still open. First fix is the stage where services are hidden in the building, and it must be right before it is hidden, because reaching it later means breaking finishes.
Electrical first fix covers conduits, back boxes, distribution routes, and points for lights, sockets, switches, and equipment. The point layout must match the room layout, the furniture layout, and the lighting plan. A socket behind a wardrobe, a light point over a wall instead of a table, or a missing point in a kitchen work zone are all first fix errors, and they are cheapest to fix while walls are open.
Plumbing and drainage first fix covers pipe routes, waste routes, water supply routes, and fixture positions for bathrooms, kitchens, laundry, and outdoor points. Falls matter in drainage. A drain without a fall will not drain. A pipe without access for maintenance will become a demolition job at the first blockage. Test plumbing routes before they are covered, and record the test result.
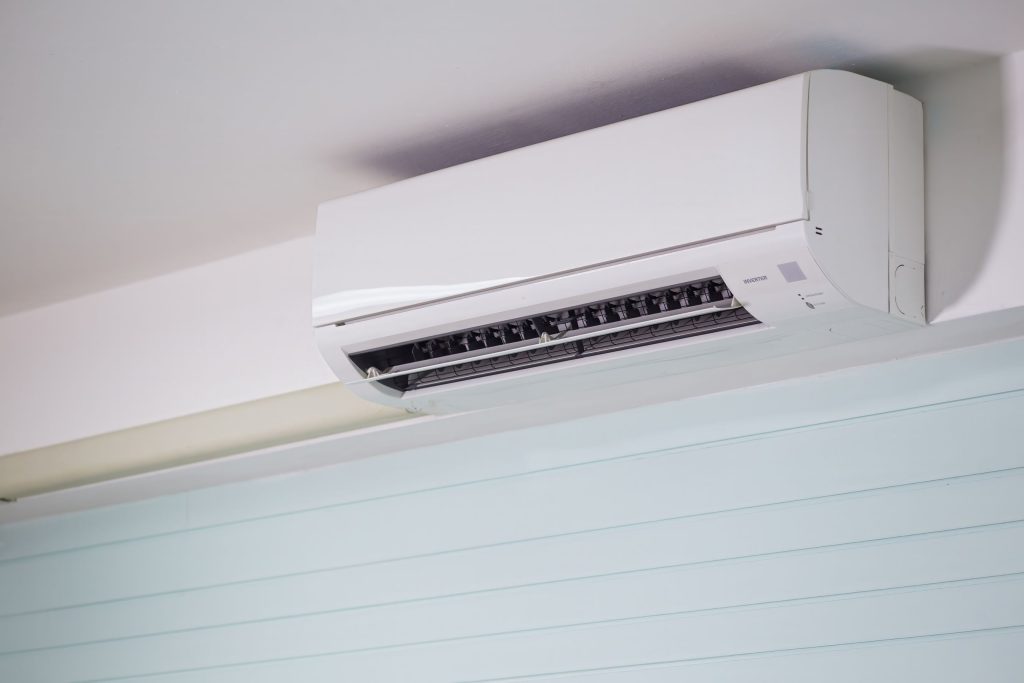
HVAC first fix covers duct routes, refrigerant routes where applicable, drainage for cooling units, and ceiling space for ducts and units. In a Dubai villa, cooling is not an afterthought. Duct size, duct route, unit position, and ceiling depth must agree, or the villa will cool unevenly, with one room cold and the next room warm. Smart home cabling and low current routes, where designed, also belong in first fix, because they need the same ceiling and wall space as power and data.
Coordination is the whole point of first fix. Electrical, plumbing, drainage, HVAC, and joinery routes share the same ceilings and shafts. If those routes are not coordinated on drawings and on site, they will clash, and the clash will be found when a ceiling closes, not before. That is why first fix is checked as a coordinated stage, not as five separate trades working alone.
Three checks that belong in G+1 villa construction stages at this stage are a point layout check against the room and furniture layout, a drainage fall and plumbing test check before covering, and a duct route and ceiling space check before ceilings close.
Three items to record in G+1 villa construction stages at this stage are the first fix point schedule, the plumbing and drainage test records, and the duct route and ceiling coordination notes.
Three mistakes to avoid in G+1 villa construction stages at this stage are closing a ceiling before first fix is tested, fixing a point layout without the furniture layout, and accepting a duct route that leaves no space for maintenance access.
Table 4. MEP first fix and second fix in G+1 villa construction stages
Service | First fix, while the building is open | Second fix, during finishing |
|---|---|---|
Electrical | Conduits, back boxes, distribution routes, and point positions | Switches, sockets, light fittings, and distribution board finishing |
Plumbing | Pipe routes, fixture positions, and supply routes | Taps, mixers, sanitary ware, and fixture connections |
Drainage | Waste routes, falls, and access points | Traps, grates, and final waste connections |
HVAC | Duct routes, unit positions, drainage, and ceiling space | Grilles, diffusers, controls, and commissioning |
Cabling and controls | Conduits and cable routes for power, data, and controls | Outlets, control panels, and system setup |
Second fix is not a repeat of first fix. It is the visible finish of the routes fixed in first fix. A good second fix cannot rescue a bad first fix, because the routes, falls, and spaces are already fixed.
Stage 6. Finishing
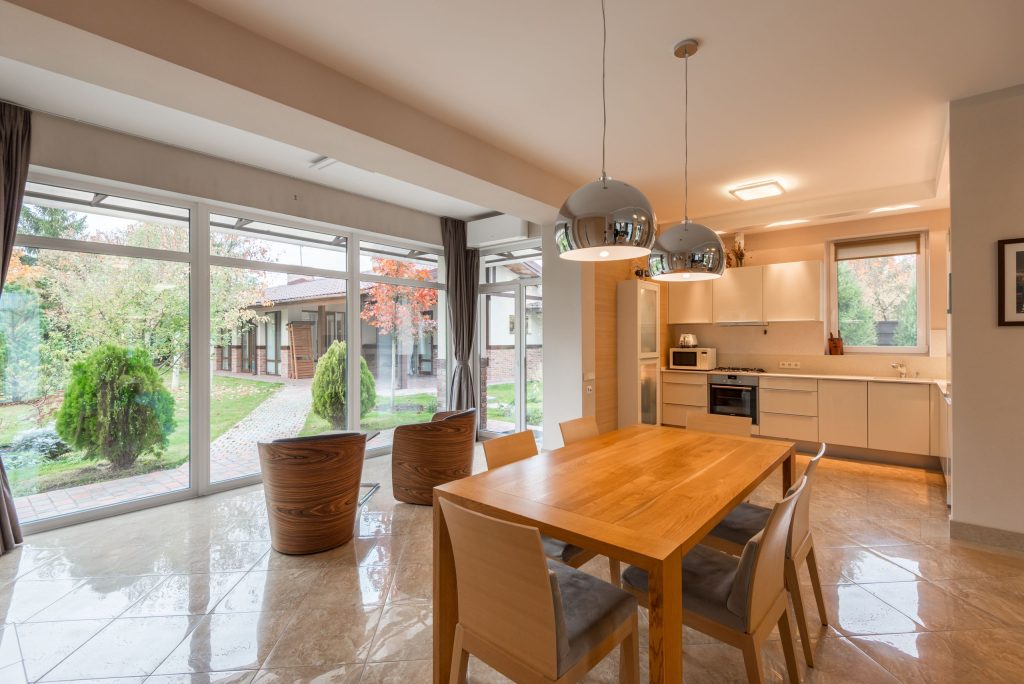
Finishing in G+1 villa construction stages is the flooring, ceilings, joinery, kitchens, bathrooms, painting, and MEP second fix that turn a weather tight shell into a home that can be lived in. This is the stage owners see most clearly, and it is also the stage where small defects become daily annoyances if they are not checked.
Flooring and tiling come after the shell is dry and the first fix is tested. Tile lines, grout lines, levels, and falls in wet areas must be checked room by room. A bathroom floor without a fall to the drain will pond water. A tile line that drifts across a room will show every day. A floor level that steps where it should run flat will trip feet and furniture.
Ceilings and false ceilings follow, with MEP second fix fitted into them. Grilles, diffusers, light fittings, and access panels must sit true, with no sag, no gap, and no clash with joinery or doors. A ceiling that is closed before second fix is tested will hide a fault that should have been found while it was open.
Joinery, kitchens, wardrobes, doors, and bathrooms are fitted to the finished shell, not to the drawings alone. Measure the built room, not the drawing, before joinery is ordered. A wardrobe built to a drawing, fitted to a wall that is out of line, will gap, bind, or fail to close. A kitchen fitted without the plumbing and electrical points in the right places will need cutting after fitting, and cutting after fitting damages the finish it was meant to complete.
Painting is the last large surface finish, and it shows every defect beneath it. Paint over a damp wall, an unchecked plaster surface, or a dusty surface will peel, bubble, or stain. Paint in the right order, after wet trades are finished and the building is dry, and check it in daylight, not only under site lights. Site lights hide defects that daylight will show on the first morning in the home.
Samples and mock ups belong in finishing. Approve flooring, tiling, paint colours, joinery finishes, sanitary ware, and light fittings as samples and, where it helps, as a mock up in one room, before they are ordered for the whole villa. A sample approved on a small swatch can look different across a whole wall, and a mock up is the cheapest place to learn that.
Three checks that belong in G+1 villa construction stages at this stage are a tile and floor level check room by room, a joinery measurement check against the built room, and a paint surface check in daylight before handover.
Three items to record in G+1 villa construction stages at this stage are the approved samples list, the second fix test records, and the finishing defect list by room.
Three mistakes to avoid in G+1 villa construction stages at this stage are ordering joinery to drawings without measuring the built room, painting over a damp or unchecked surface, and closing a ceiling before second fix is tested.
Table 5. Finishing checklist by area in G+1 villa construction stages
Area | Finish to check | Owner check |
|---|---|---|
Living and bedrooms | Flooring, paint, doors, sockets, lighting, and ceiling finish | Floor levels, paint in daylight, door operation, light points |
Kitchen | Flooring, tiling, worktops, joinery, plumbing, and electrical points | Worktop levels, joinery alignment, tap and appliance points |
Bathrooms | Tiling, grout, sanitary ware, drainage falls, and waterproofing | Drainage falls, grout lines, fixture operation, no ponding |
Stairs and corridors | Flooring, handrails, lighting, and wall finish | Stair nosings, handrail fixing, lighting, wall finish |
Outdoor areas | Terraces, boundary walls, gates, planting, and outdoor lighting | Terrace falls, gate operation, planting, lighting |
Pool area, where designe | Pool finish, plant room, terraces, and safety details | Pool finish, plant room access, terrace finish |
External works and landscaping, where designed, should finish with the house, not after it. Terraces, boundary walls, gates, planting, irrigation, and outdoor lighting change how the villa is used every day, and they should be checked with the same snag list as the inside, not left as an afterthought.
Stage 7. Handover
Handover in G+1 villa construction stages is the final inspections, snagging, completion certificate, service connections, and key handover that close the build and open the home. Handover is not a single day. It is a sequence, and it must be completed in order, or the owner will inherit defects, missing documents, and unconnected services.
Final inspections come first. The villa is inspected against the approved drawings and the inspection plan. Structural inspections, authority inspections, and joint inspections each have their own points, and each point must be recorded. A joint inspection, with owner and contractor walking the villa together, is the moment to list every defect in writing, room by room, with a date for correction. A verbal snag list is not a snag list. It will be forgotten, disputed, or lost.
Snagging follows inspection. Every snag is corrected, then checked again. A snag is not closed because it was visited. It is closed because it was fixed and rechecked. Keep the snag list as a single document, with each item marked as open, fixed, or rechecked, until the list is clear. That discipline is what separates a clean handover from a handover that drags on for months with small defects still open.
The completion certificate is the authority milestone that closes the build. The contractor applies for completion, a joint team inspects, and Dubai Municipality issues the completion certificate so services can be connected. The final developer NOC, where required, and the DEWA connection for electricity and water follow the completion route for the plot. Do not treat handover as complete before the completion documents for the plot are in hand, because connection and occupation depend on them.
As-built drawings and handover documents close the paper trail. As-built drawings show what was actually built, not only what was drawn. Operation and maintenance notes, equipment notes, and inspection records should be handed over with the keys, so the owner, and any future maintenance team, can find services, isolate them, and maintain them without guessing.
Three checks that belong in G+1 villa construction stages at this stage are a joint inspection walkthrough room by room, a snag list recheck after correction, and a completion document check before keys are accepted.
Three items to record in G+1 villa construction stages at this stage are the final snag list with recheck notes, the completion certificate and final NOC records for the plot, and the as-built drawings and handover documents.
Three mistakes to avoid in G+1 villa construction stages at this stage are accepting keys with an open verbal snag list, accepting handover without completion documents, and accepting a villa without as-built drawings for services and structure.
Table 6. Handover checklist in G+1 villa construction stages
Handover item | What it proves | Owner check |
|---|---|---|
Joint inspection walkthrough | Every room was inspected with the owner present | Walkthrough notes by room, signed and dated |
Snag list, corrected and rechecked | Defects were fixed, not only visited | Each snag marked fixed and rechecked, not only open |
Completion certificate | Authority completion milestone for the plot | Certificate in hand, with the plot and villa details matching |
Final developer NOC, where required | Community completion route for the plot | Final NOC record matches the built scope |
DEWA connection | Electricity and water connection route for the plot | Connection records match the completed villa |
As-built drawings | What was actually built, for structure and services | Drawings show built positions, not only design positions |
Keys and handover documents | Home and records handed over together | Keys, documents, and inspection records received together |
Ask what defects terms are written in your contract, and how defects are reported and cleared after handover, before you sign. That question belongs at contract stage, not at handover, because handover is too late to add a term that was never written.
How does G+1 villa construction stages apply to a villa or office project in Dubai?
G+1 villa construction stages apply to a villa or office project in Dubai as the same ordered sequence of plot and approvals, foundation, structure, block and masonry, MEP first fix, finishing, and handover, with room sizes, service loads, and approval routes adjusted for the building type.
A villa project and an office project share the same logic, and they differ in the details. A villa is planned around family rooms, bedrooms, kitchens, bathrooms, stairs, and outdoor areas. An office project is planned around work areas, meeting rooms, reception, storage, and building services that serve many users at once. The stage order does not change. The room brief, the service loads, and the approval route change with the building type.
For a villa, the critical checks are room layout, stair position, wet area waterproofing, cooling loads room by room, and outdoor works that match the house. For an office, the critical checks are open plan flexibility, meeting room acoustics where designed, electrical and data capacity for workstations, cooling loads for occupied hours, and building management rules for access, working hours, and fit out standards. Both projects need the same discipline: approved drawings first, inspections at each stage, first fix before finishes close, and snagging before handover.
new build G+1 villa construction in Dubai is the Core page for a new G+1 build. civil and structural works specialists in Dubai covers the frame and structural works in that sequence. Handy Care masonry and block works covers the block and masonry stage in that sequence. Read those pages with this guide, and judge a project by whether its stage order, its inspections, and its handover documents match the sequence described here.
Stage order and dependencies
Stage order is not a preference. It is a dependency chain. Plot and approvals fix the design that foundation and structure must follow. Foundation fixes the base that structure must load. Structure fixes the frame that blockwork must fill. Blockwork fixes the walls that MEP first fix must run through. MEP first fix fixes the routes that finishing must cover. Finishing fixes the surfaces that handover must inspect.
Break that chain at any point, and the cost of correction rises at every later stage. A design change after structure is cast is not a drawing change. It is cutting, rebuilding, and reinspection. A service change after finishing is not a point move. It is breaking a finished wall, ceiling, or floor, then remaking it. A snag found at handover is not a small fix if it hides a first fix fault. It is a finish removed to reach a service that should have been tested while it was open.
Dependencies also run across trades, not only across stages. Structure depends on MEP openings. Blockwork depends on MEP routes. Ceilings depend on duct routes and light points. Joinery depends on wall lines and floor levels. Painting depends on plaster, dryness, and wet trade completion. A programme that plans stages without planning trade dependencies will look ordered on paper and clash on site.
The practical rule is simple. Freeze the design for a stage before that stage starts. Check that stage before the next stage covers it. Record the check. Then move on. That rule, repeated seven times, is the whole programme in one paragraph.
Where delays usually start
Delays usually start before construction, not during it. They start with an incomplete approval list, a design clash found on site, a soil or survey fact found late, or a contract that leaves scope, variations, or defects terms unclear. Those four causes are not construction delays. They are planning delays, and they are cheapest to remove at plot and approvals stage.
Delays also start at stage boundaries. A foundation inspection not booked, a slab inspection not recorded, a first fix test not completed before ceilings close, or a sample not approved before an order is placed will each stall the next stage. The stall looks like a site delay, but its cause is a missing check, a missing record, or a missing approval at the boundary.
A third delay source is change without control. A room moved after blockwork, a finish changed after ordering, or a service point moved after first fix will each trigger rework, reordering, and reinspection. Change itself is not the problem. Change without a written variation, a price method, and a programme effect is the problem, because it creates work without a record of who agreed it, what it changed, and what it cost.
Table 7. Where delays usually start in G+1 villa construction stages, and the plain question to ask
Delay source | Early sign | Plain question to ask |
|---|---|---|
Incomplete approval list | Work planned before a required NOC or permit is in hand | Which approvals are still open, and who owns each one |
Design clash found on site | Architecture, structure, and MEP drawings do not agree | Which drawing set is the agreed set, and where are clashes logged |
Missing inspection record | Next stage planned before the last stage inspection is recorded | Which inspections are recorded, and which are still open |
Unapproved sample or finish | Order placed before a sample is approved | Which samples are approved, and which are still open |
Uncontrolled change | Scope changed without a written variation | What is the written variation, and what is its programme effect |
Untested first fix covered | Ceiling or wall planned to close before first fix tests are recorded | Which first fix tests are recorded, and which are still open |
None of these delays needs a new technology to prevent. Each one needs a list, a record, and a check before the next stage starts. Owners who keep those three things, even in simple form, will spot most delays before they become programme delays.
Next steps and related reading on G+1 villa construction stages
Start with three steps. First, get the plot facts in writing: affection plan, community rules where they apply, survey, and soil facts. Second, get the design and approval list in writing: architecture, structure, and MEP drawings that agree, plus the developer NOC where required and the building permit route. Third, get the contract facts in writing: itemised BOQ, scope and exclusions, payment milestones, variation method, delay terms, and defects terms.
Then use the stage tables in this guide as a check sheet. At each stage, ask for the inspection record, the test record, or the sample approval that belongs to that stage, before the next stage covers it. Keep those records with the drawings, the approvals, and the snag list, so handover is a file of facts, not a memory of visits.
For related reading on choosing a contractor, see the live post 5 Checks for Choosing a Building Contractor in Dubai, which covers licence and registration checks, past work checks, scope clarity, supervision, and handover process in plain language. For a new build, start from the Core pages linked in the Bridge section above, and judge any proposal by its stage order, its inspection plan, and its handover documents.
contact Handy Care for a discussion about a G+1 villa construction project in Dubai. Bring the plot facts, the design brief, and the approval position for the plot, so the discussion starts from facts, not from assumptions.
Demolition as the opposite pole of G+1 villa construction stages
Demolition is the opposite pole of G+1 villa construction stages. Construction adds, in order: foundation, frame, walls, services, finishes, and handover. Demolition removes, in reverse: finishes, services, walls, frame, and foundation, until the plot is clear again.
That contrast is useful, because it shows why construction order cannot be reversed. A wall cannot be built before its frame. A finish cannot be fitted before its service route is fixed. A handover cannot be signed before inspections and snagging are complete. Demolition can start at the top and work down, because removal does not need to support what follows. Construction must start at the bottom and work up, because every stage must support the stage above it.
If a build feels out of order, use demolition as a test. Ask whether the stage being started depends on a stage that is not yet complete. If it does, stop that stage, complete its dependency, record the check, and then restart. That single test will catch most out of order work before it becomes rework.
Frequently Asked Questions (FAQs)
Find answers to some common inquiries below. Reach out for more information!
Planning a project in Dubai? Talk to Handy Care before you sign.
Final checklist before you start
Before you start a G+1 villa build in Dubai, check the plot, the approvals, and the design first. Confirm the affection plan, the community rules, the survey and soil facts, the approved drawings set, the developer NOC where required, and the building permit, all in writing.
Then confirm the contract and BOQ, the inspection plan, and the handover documents, all in writing. Use Tables 1 to 7 as a check sheet, ask for each inspection and test record before the next stage covers it, and accept keys only when the snag list is clear, the completion documents are in hand, and the as-built drawings are received.
Ready to Remodel Your Property? Schedule a Free Local Consultation Today.
Areas We Serve in Dubai & UAE
Providing expert villa renovations, new G+1 construction, and maintenance services across all major Dubai communities.
Areas We Serve
Dubai Marina, JLT, Palm Jumeirah, Jumeirah, Umm Suqeim, Downtown Dubai, Business Bay, Dubai Hills, Arabian Ranches, Emirates Hills, JVC, Al Barsha, Mirdif, Al Quoz, Dubai Silicon Oasis, Dubai South
Not listed? Just ask! For wider reach, we also work with clients seeking construction companies in the UAE who need a Dubai-licensed partner for villa or commercial projects.
Related Services to Explore
Explore Villa Renovation for a complete refresh of your home in Dubai.
See New Build G+1 for a new villa or building built from the ground up.
Keep Building Maintenance in mind for ongoing repairs and upkeep after handover.
Contact Handy Care to discuss your project and request a quote.
Meet the Contractor

MBRHE Approved Contractor, Housing File No. 1076949. Approved company with Emirates Islamic Bank. 200+ completed projects. Office in Al Garhoud, Dubai.
Service Matrix
- Villa Renovation
- New Build G+1
- Building Maintenance
- MEP Services
- Structural Foundations
- Interior Refurbishment
- Luxury Bath Renovations
- Custom Kitchen Additions
- Contact Handy Care
Leave a Reply